


How To Make A Compost Bin: A Comprehensive Guide for Sustainable Gardening
| BY Ingrid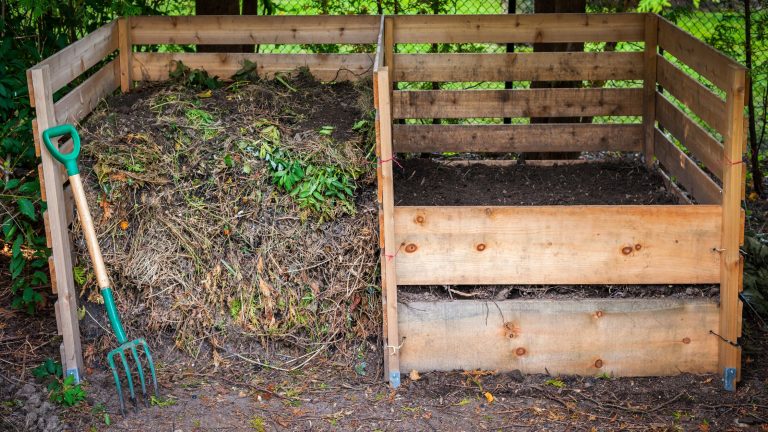
As spring breathes new life into our gardens, what better way to kickstart the season than by creating your very own compost bin? From reducing waste to enriching soil, composting offers a myriad of benefits for sustainable gardening practices. In this guide, our team of experts have pooled their knowledge to provide you with valuable insights into the process and show you how to make a compost bin effortlessly.
Step 1: Selecting an Ideal Location
Selecting the ideal location for your compost bin is crucial to its success. Look for a location that receives ample sunlight but also offers some shade, as this balance will help maintain optimal conditions for composting throughout the varying temperatures of spring.
Consider accessibility when choosing the location. You'll want a spot that's easily reachable for depositing kitchen scraps and garden waste, as well as for turning the compost when needed. This convenience will encourage regular maintenance, ensuring a healthy and productive compost pile.
Most importantly, pay attention to drainage. Choose an area with good drainage to prevent waterlogging, which can impede the composting process and create unpleasant odours. A slightly sloped surface can help water drain away from the compost bin, keeping it dry and aerated.
If you're composting in a smaller space, such as a balcony or patio, explore vertical options like compost tumblers or stackable bins. These compact solutions can fit into tight spaces while still providing efficient composting capabilities.
The location you choose for your compost bin will influence its effectiveness and your overall composting experience. By taking the time to select an ideal spot, you'll set the stage for successful composting throughout the spring and beyond.
Step 2: Gathering Your Materials
Before diving into the construction of your compost bin, it's essential to gather all the necessary materials.
If you're opting for a wooden pallet compost bin, start by sourcing sturdy wooden pallets. Look for pallets that are in good condition, free from rot or chemical treatments that could harm your compost.
For those choosing to construct a compost bin from wire mesh, you'll need to acquire the appropriate gauge wire mesh or fencing material. Look for mesh with small enough gaps to contain your compost while still allowing for adequate airflow. Hardware stores typically carry a variety of wire mesh options suitable for composting projects.
In addition to the main structural materials, gather nails or zip ties to secure the components of your compost bin together. If you're using wooden pallets, nails will be necessary for fastening them securely. Alternatively, zip ties offer a quick and easy solution for assembling a wire mesh bin.
Consider adding optional accessories to enhance your composting experience. A lid or tarp can help regulate moisture levels and protect the compost from excessive rain or pests. You may also want to invest in a compost thermometer to monitor the internal temperature of your compost pile, ensuring optimal conditions for decomposition.
Once you have all the necessary materials assembled, you'll be ready to embark on the construction of your compost bin!
Step 3: Constructing the Compost Bin
Whether you opt for a wooden pallet bin or a wire mesh structure, the process is straightforward and rewarding.
If using wooden pallets:
- Arrange three pallets upright to form three sides of the bin.
- Secure them together at the corners using nails or zip ties.
- Leave one side open for easy access to turn and remove compost.
If using wire mesh:
- Shape the mesh into a circle or square, securing the ends together with wire or zip ties.
- Ensure the mesh is sturdy enough to contain the compost heap securely.
Step 4: Initiating the Composting Process
With your compost bin constructed, it's time to kickstart the composting process.
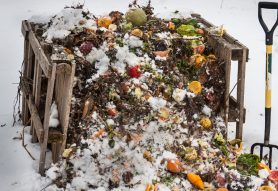
Start by layering your compost bin with a balanced mixture of green and brown materials. Green materials, such as kitchen scraps and fresh garden waste, provide nitrogen, while brown materials, like dried leaves and cardboard, supply carbon. Aim for a ratio of approximately two parts brown to one part green to maintain a healthy composting environment.
As you add materials to your compost bin, ensure they are chopped or shredded into smaller pieces to facilitate decomposition. This will speed up the composting process and help create a homogeneous mixture that breaks down more efficiently.
To promote aerobic decomposition, which relies on oxygen, periodically turn the compost pile with a pitchfork or compost turner. This aerates the pile, allowing beneficial microorganisms to thrive and accelerate decomposition. Aim to turn the compost every one to two weeks, or whenever the temperature inside the pile exceeds 140°F (60°C).
Throughout the composting process, monitor the moisture levels of your compost pile. The ideal moisture content is like that of a wrung-out sponge: damp but not soggy. If the compost pile becomes too dry, water it lightly with a hose or watering can. Conversely, if it becomes too wet, add more dry brown materials to absorb excess moisture.
As spring unfolds and temperatures rise, your compost pile will come to life, teeming with activity as microorganisms work their magic to break down organic matter.
By initiating the composting process with care and attention to detail, you set the stage for a successful journey towards nutrient-rich compost that will nourish your garden for seasons to come.
Step 5: Maintaining Your Compost Bin
To ensure successful composting, follow these essential maintenance tips:
- Regularly turn the compost to aerate the pile and facilitate decomposition.
- Keep the compost moist by watering it occasionally, ensuring it remains damp but not waterlogged.
- Adjust the mix of brown and green materials as needed to maintain a balanced compost pile.
- Consider covering the bin with a lid or tarp to retain moisture and heat, especially during cooler weather.
Step 6: Harvesting Your Compost
After several weeks to months, depending on various factors such as temperature and moisture levels, your compost will mature and be ready to use. When the compost appears dark, crumbly, and earthy smelling, it's time to harvest it. Shovel out the finished compost from the bottom of the bin and utilise it to enrich your garden soil.
In Conclusion
Creating your own compost bin is a rewarding endeavour that promotes sustainable gardening practices and reduces waste. By following these simple steps, you can embark on a journey towards a greener, more environmentally friendly lifestyle.
For more tips on waste management and sustainable living, visit www.wastewise.co.uk and explore our comprehensive resources.
